How to Install and Use GPS Stamp Camara on Android
Documenting field work, civil construction progress, land surveys, or travel memories requires verifiable location and time context. GPS Stamp Camara is an Android utility designed by SR Computers to automatically capture photographs overlaid with exact latitude, longitude, physical address, date, time, and map pin stamps.
Whether you are setting up the application for the first time or configuring custom camera settings for your team, this guide covers step-by-step instructions on installation, permissions, camera usage, stamp options, and troubleshooting.
What is GPS Stamp Camara?
GPS Stamp Camara is an Android mobile camera application that integrates your smartphone's hardware camera sensors with location services. Instead of manually recording site notes or editing metadata afterwards, the app automatically bakes location text and visual map overlays directly into your photos in real time.
The application operates 100% locally on your phone. It does not require user account registration, cloud logins, or remote server uploads, ensuring your captured photos remain private in your device's local media gallery.
How to Install GPS Stamp Camara on Android
GPS Stamp Camara is distributed exclusively through the Google Play Store to guarantee software safety and Google Play Protect security verification.
- Open the Google Play Store app on your Android smartphone.
- In the search bar, type
GPS Stamp Camaraor navigate directly to the Official Google Play Store Listing. - Verify that the developer is listed as SR Computers.
- Tap Install. Once the download completes, tap Open to launch the application.
How to Give Required Permissions
To operate correctly, GPS Stamp Camara requests three standard Android device permissions when launched for the first time:
- Camera Permission: Required to display the live camera viewfinder, switch between front and rear lenses, and take photos or record videos. Select "While using the app".
- Location Permission: Required to fetch your current latitude, longitude, altitude, and street address. Select "While using the app" and ensure Precise Location is toggled ON.
- Storage / Media Permission: Required to save your stamped photos directly into your device's photo gallery and display them in the built-in gallery reader.
You can review or modify these permissions at any time in your Android phone's Settings > Apps > GPS Stamp Camara > Permissions menu. Learn more about our data safeguards in our official Privacy Policy.
How to Capture Your First GPS-Stamped Photo
Capturing geotagged photos with GPS Stamp Camara takes only a few seconds:
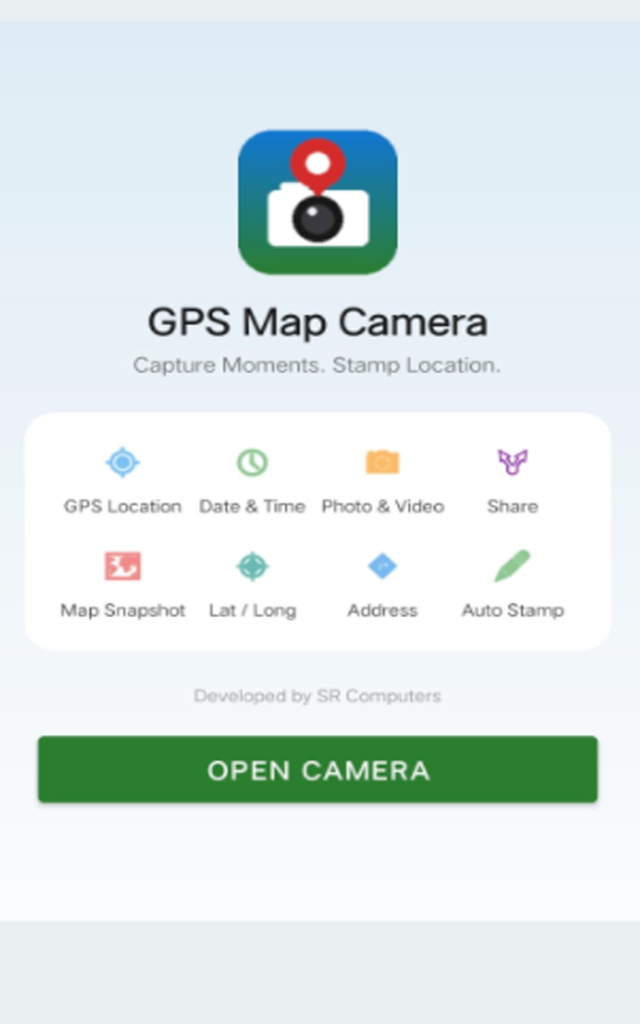
- Open the GPS Stamp Camara main dashboard.
- Verify that the location status card shows active location coordinates.
- Tap the green "OPEN CAMERA" button.
- Point your device at the subject. A glassmorphic stamp card will display live location text and date/time info at the bottom of the camera screen.
- Tap the shutter button. The app bakes the stamp overlay onto the photograph and saves it instantly to your phone's gallery.
How GPS Location Information Appears on Photos
GPS Stamp Camara supports comprehensive location and time metadata elements that can be toggled on or off based on your project requirements:
- Geographic Coordinates: Latitude and Longitude displayed in decimal degrees (e.g.,
15.8281° N, 78.0373° E). - Physical Address: Street name, district, city, state, postal code, and country.
- Date & Time Stamp: Automated timestamp in DD/MM/YYYY or MM/DD/YYYY format alongside 12-hour or 24-hour time.
- Map Preview: Mini map pin thumbnail showing your location on Google Maps styles (Normal, Satellite, Terrain, Hybrid).
- Elevation & Compass: Altitude meters above sea level and cardinal compass direction.
How to Change Stamp Settings & Styles
You can customize how photo stamps look directly from the app dashboard before opening the camera:
- Date & Time Format: Switch between 12-hour (AM/PM) or 24-hour military time, and adjust date formatting.
- Coordinate Format: Display coordinates in Decimal Degrees (DD) or Degrees Minutes Seconds (DMS).
- Map Style: Choose between satellite view, street map view, or hybrid map tiles.
- Toggle Stamp Cards: Enable or disable specific data elements (such as hiding altitude or showing address only).
Explore all available options on our Features Overview page.
How to Save and Share Photos
Photos captured with GPS Stamp Camara are automatically saved to a dedicated album in your phone's internal storage (`Internal Storage/Pictures/GPS Stamp Camara`). You can view, organize, and share them using:
- Built-in App Gallery: Tap the Gallery icon on the home dashboard to browse recent stamped photos.
- Native Android Share Sheet: Tap the Share button on any photo to send it directly via WhatsApp, Email, Telegram, Google Drive, or Bluetooth.
Troubleshooting Common Problems
If you encounter technical issues while using GPS Stamp Camara, try these recommended solutions:
1. Location Not Appearing or Loading Slowly
Ensure your phone's main Location/GPS toggle is turned ON in the Android notification shade. If indoors or surrounded by tall buildings, step near a window or outdoors to establish satellite lock.
2. Camera or Location Permission Denied
Go to Android Settings > Apps > GPS Stamp Camara > Permissions and set both Camera and Location to "Allow while using the app".
3. Image Rotation Issue
Our recent August release resolved screen rotation behavior. If photos appear rotated, ensure your Android Auto-Rotate setting is enabled or restart the camera preview.
4. Photo Not Saving to Gallery
Check if your phone's internal storage is full. Ensure Storage/Media permission is granted to allow the app to write files to your device picture directory.
For further assistance, reach out to our dedicated support team on our Contact Support page.
Frequently Asked Questions
GPS Stamp Camara captures hardware latitude and longitude coordinates offline without internet. An active internet connection is only needed to convert coordinates into street address text or download map tiles.
No. Your photos are processed 100% locally on your smartphone and saved directly to your local device gallery. We do not maintain any cloud photo databases.
GPS Stamp Camara is an Android application designed for mobile smartphones. To view or transfer photos on a PC, simply connect your phone via USB cable or share photos via Google Drive.
No account or login is required. You can install the app from Google Play and start capturing geotagged photos immediately.
Conclusion
GPS Stamp Camara provides a reliable, easy-to-use solution for adding accurate location coordinates, addresses, dates, and time stamps to your Android photos. By granting the necessary permissions and configuring your preferred stamp layout, you can streamline your field documentation effortlessly.
Get Started with GPS Stamp Camara
Download the official Android application on Google Play Store today.
android Download Official Play Store App